Monday, December 13, 2010

Christmas Light Splendor

The kids were really helpful with the tree this year. I sat on the floor and added the metal hangers to all the balls and they would come get them as fast as I could put the hooks on. They were so careful about spacing them, which is a HUGE difference from year's past where only a few limbs were decorated heavily. I love that they were into decorating this year...they were really helpful. I love spending time together as a family!
The Christmas tree fit perfectly in its spot this year. We picked a tall, slender christmas tree. Every year we go and cut our own up on the mountain. This makes the tree really fresh and it's only $10 for a christmas tree permit. Plus it's a family adventure that the kids remember all year! 
I love our Christmas tree this year! The tree reaches all the way to the ceiling making it 9 feet tall! It is SO beautiful all lit up at night. It is so soothing to sit and listen to christmas music after the kids are all tucked into bed and enjoy the light splendor and it is one of my favorite things to do this time of year! A great way to relax at the end of a day!
So pretty all lit up! 
After the kids went to bed I set up the camera and tripod and took some pictures of the splendor. 
This is the mantle all decorated for Christmas. I find it interesting that I never decorate the same year-to-year. You can check out last year's decorations HERE. I have almost all the same items yet it's always different. The only thing I bought at all were the green spiral metal things for the Christmas tree to add movement. That really is the only thing I added to my christmas collection of stuff this year.
I just love it all lit up! 
Last year I didn't have drapes up on both sides of the mantle so I tied this tule around the drapery rods and hung huge ornaments. I finally got my 9 foot drapes up this year(floor to ceiling) and I didn't want to take them down.(I just put them back up after taking them down for Halloween) so I put the tule and ornaments on my kitchen window. I already had the tree limbs hung with a little greenery so adding the tule was easy and then just had to hang the large red ornaments. 
The kitchen window looks SO festive this year! 

This is one of my favorite things to do...turn off all the lights except the christmas lights and enjoy the splendor. I love this time of year!

Thursday, December 9, 2010

Daughter's Bedding DONE!!!

To finish my daughter's bedding I had to do the bolster pillow and make the comforter cover.  I showed my daughter the comforter I bought on black friday and she has been encouraging me to finish ever since. The bloom pillow I finished a while ago. Check it out here. The ruffle pillow you can check out here
This is the bolster pillow form. 
To match the other pillows, I wanted to encorporate all of the different fabrics. While trying to decide which edging would look best...I put them together and instantly fell in love. Do both!!!! 
Tip: to get cording to look great every time, you have to sew the fabric around the cotton cording (aqua color) first and then you want to sew the pink ruffle edge with the aqua to the edge of the pink polka dot fabric. If you sew it first to one edge before you make your final seam...the cording will look great every time. Plus, it won't move while you are making the final seam.
This is the view from the finished side. You can see why I fell in love...why choose one when you can have both. I actually only had a 1/2 inch of aqua fabric left over. It was JUST big enough to finish this last pillow. Wahooo! 
Once I finished the cording. I sewed the rectangle into a tube shape. Then it was onto the ends. I turned it inside-out to sew the end on. I sewed the first end then started on the second end. The end fabric is the extra material from the fitted sheet. So it all perfectly matches. The bed pillow looks great with the other pillows because they all have matching and coordinating fabrics. 
This is what it looked like inside the tube. This will be the finished side. 
Turned right-side out. 
I sewed half of the second bolster end so I would have less hand stitching. Then I pulled it over the bolster. 
I hand stitched the end of the bolster. 
The hand stitching was almost invisible due to the white background of the end fabric. 
This is the finished bolster. 
The last thing I had to complete was the comforter cover. I found this entire bolt of "sweater" fabric at wal-mart for five dollars. It was a sale they had a few months ago. They were selling the entire bolt for $5. It was a table full of bolts of fabric. I picked this one out and knew this would look great as the comforter cover so it was perfect. SOLD! Enough fabric to cover both sides of the comforter. 
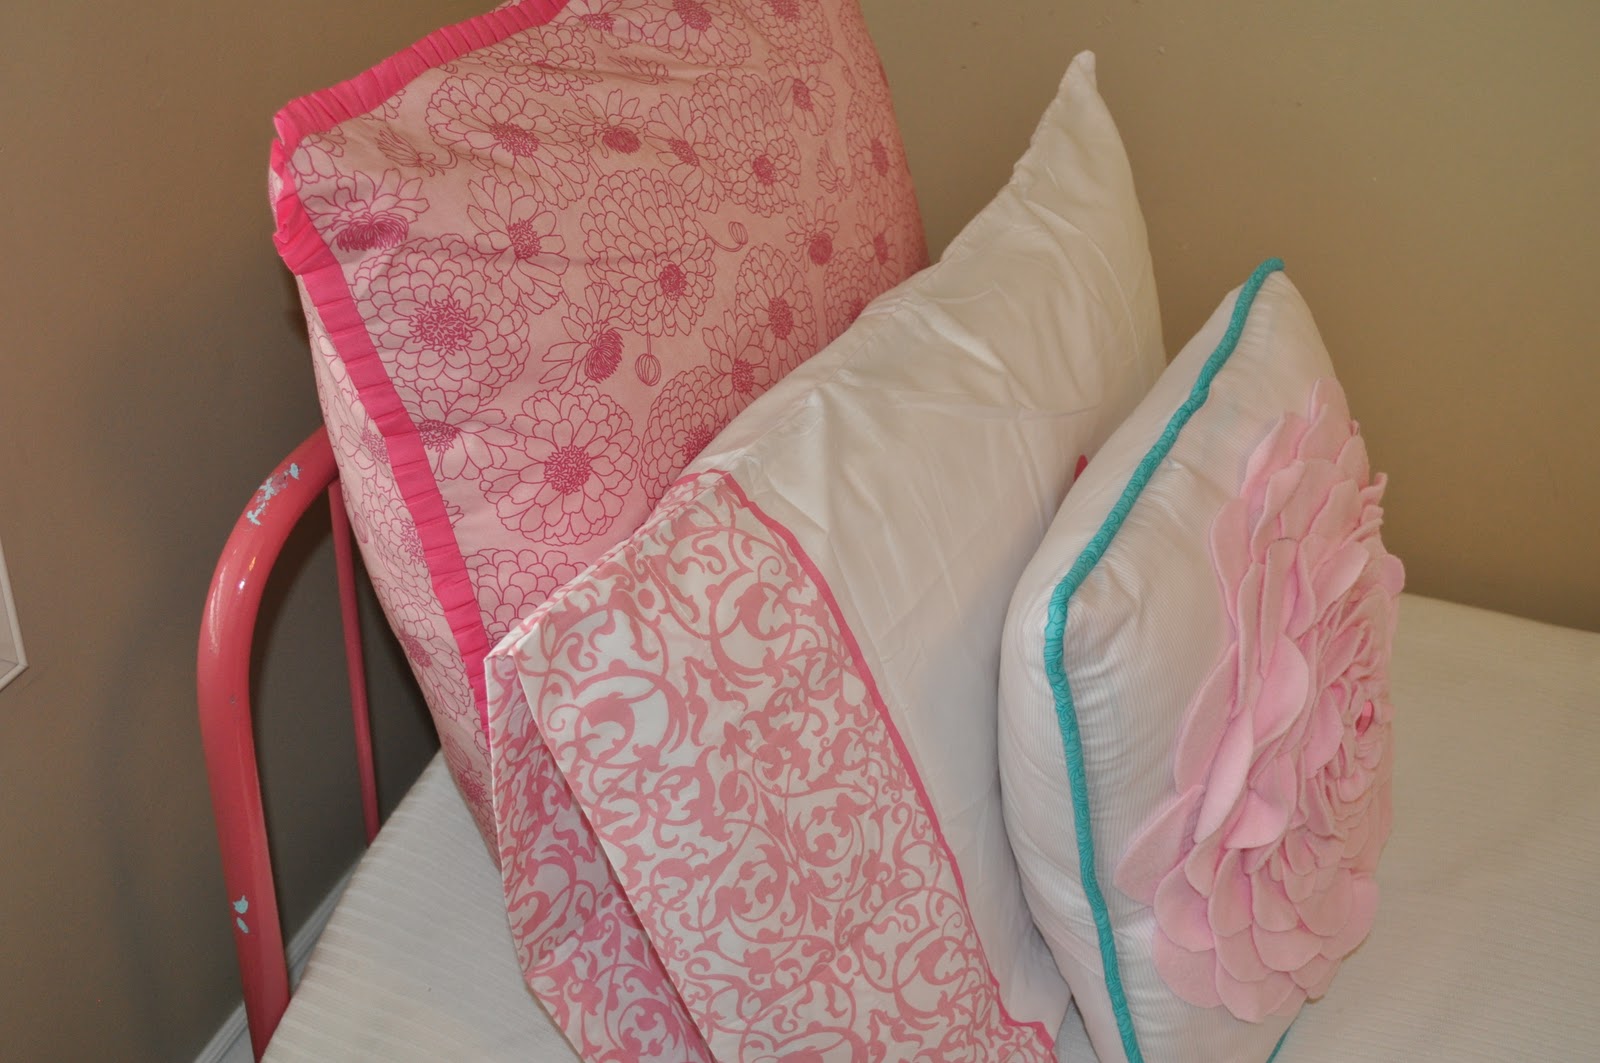
Now the comforter creates the perfect backdrop for the fun pillows. It's perfect for my daugher. She loves soft, fluffy things. My daughter slept with this comforter for the first time last night and she just kept saying how much she loved it because it's SO SOFT! Just like a comfy sweater.

The large pillow in the back can also be used as a floor pillow for when she has friends or brothers playing in her room. 
The pink ruffled edging on the bolster pillow perfectly matches the fun pink color in the iron bed. The aqua color cording pulls in the flecks of aqua on the bed frame.Very custom bedding! 
My daughter asked me yesterday, "What do I need to help you with to be able to get you to finish my bed." YIKES!! Have you ever had a five year old ask you that!! It was definetely motivating! I put her to work helping me cut, pin and sew everything I had left. She loves being my little helper! I'm sure she's thrilled to finally have her bedding finished! 
SO CUTE!! I am so glad I finally found the white down comforter for a steal on black friday. It helped jump start me to finish this project. My daughter LOVES it...and that's what matters!

Saturday, December 4, 2010

Lanterns Revamped

I loved these lanterns so much from halloween that I knew I had to revamp them to be able to use them through the entire holiday season.  
Remember the purple back lantern with flickering halloween lights. 
I painted the back of the lantern (inside) black so I could use it for Thanksgiving with some pumpkins lining the steps and with greenery for christmas. I also changed the bulbs from flickering to low wattage bulbs.
I added greenery with red balls around the side of the door. 
A little bit of cheer around the door. It sets the stage for what you will find inside the door. 
The greenery is from our freshly cut christmas tree. We always cut a few extra feet taller tree than our house can hold so I will have extra pine to decorate with! Nothing better than fresh pine! 
Red ribbon adds the perfect color splash for Christmas! 
Simple Elegance! I just love the holidays!

Thursday, December 2, 2010

Finally Found!

Black Friday was a success!! We went home for Thanksgiving to our small home town and we hit the few stores in town for the black friday sale. I have been looking for a WHITE comforter to finish my daughter's bedding. The fabric is a white sweater knit looking fabric and I wanted it white underneath the fabric so a color didn't show through the lighter fabric. I could find every color available for a comforter except white. I did find a white comforter once but it was over sixty dollars and the bargain hunter in me knew I could find one better priced. I still had to cut off part of the twin comforter to fit this custom bed so I didn't want to spend too much when you just had to cut it. This white feather & down comforter was over half off....SCORE!! So, I will finally finish this project. Sometimes you have to wait to find exactly what you want...I just wish I could have found it sooner but, better late than never!

Tuesday, November 23, 2010

Sneek Peek

I've been working on this project for a few days now. In between packing to go to the parents house for Thanksgiving and preparing food for the feast. I thought this would be only a day project but, it's turning into a few more days (almost a week and will probably take two). I've been editing photos that I took all late summer and fall(trying to save money by taking my own kids yearly photos). I had some of them printed and they weren't exactly perfect so I've had to do some more editing on lighting and shadows to get them right.So I've been to the photo store a few times this week.
So, here's a sneek peek at what I've been working on.
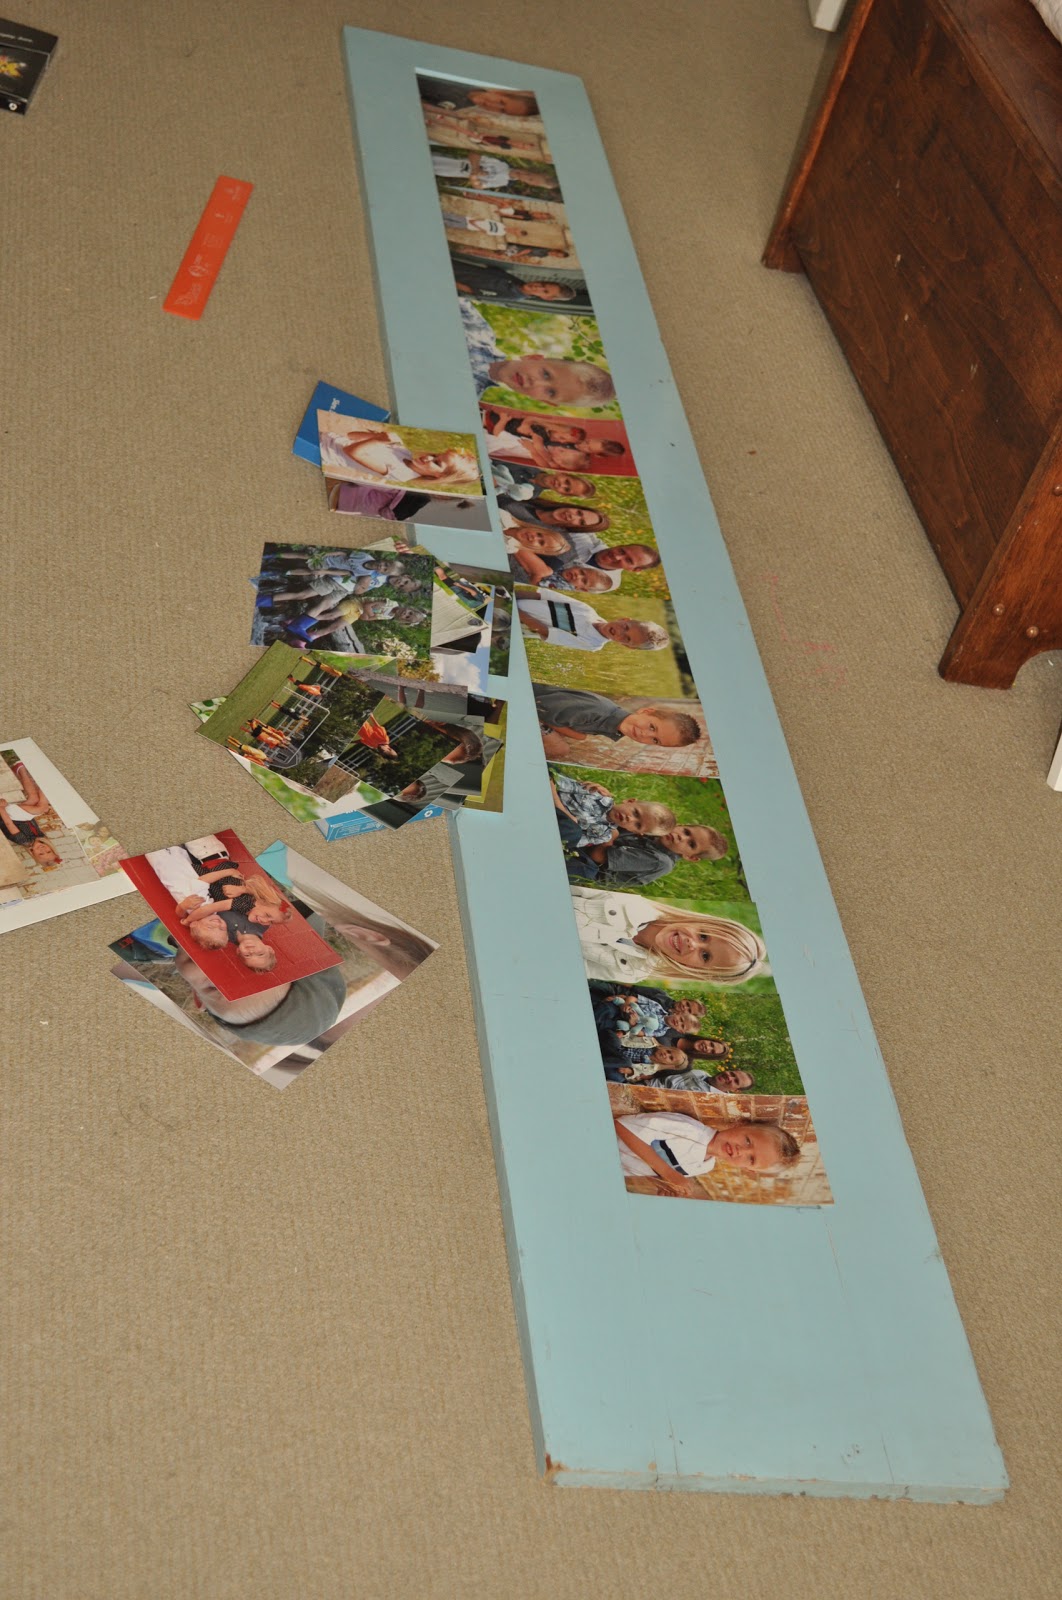
This old cupboard door is over 5 feet long yet is the perfect size for hanging above the king bed in the master bedroom.
Now that the pictures are all laid out...and re-laid out...I have to cut them down. The board is 5 and 3/8 inches tall...so that means I have to hand cut them to fit in this unique cupboard door. I had to print them in all different sizes because if the photo went horizontal...it had to be at least six inches tall, which meant weird print sizes.
 I also need to have vinyl cut for the long end of the cupboard door (it was only after I got all the pictures laid out that I realized that because I am hanging it horizontal that the extra space on the cupboard end would be perfect for a custom vinyl, I just have to get it designed and cut. Man, I wish that I had my own vinyl machine)
So, I will get this finished when I get back from Thanksgiving. Just thought you might want a peek at what I've been doing these past few weeks. Can't wait to show you the finished project...completed and hung on the wall!

Thursday, November 4, 2010

Thanksgiving Colors

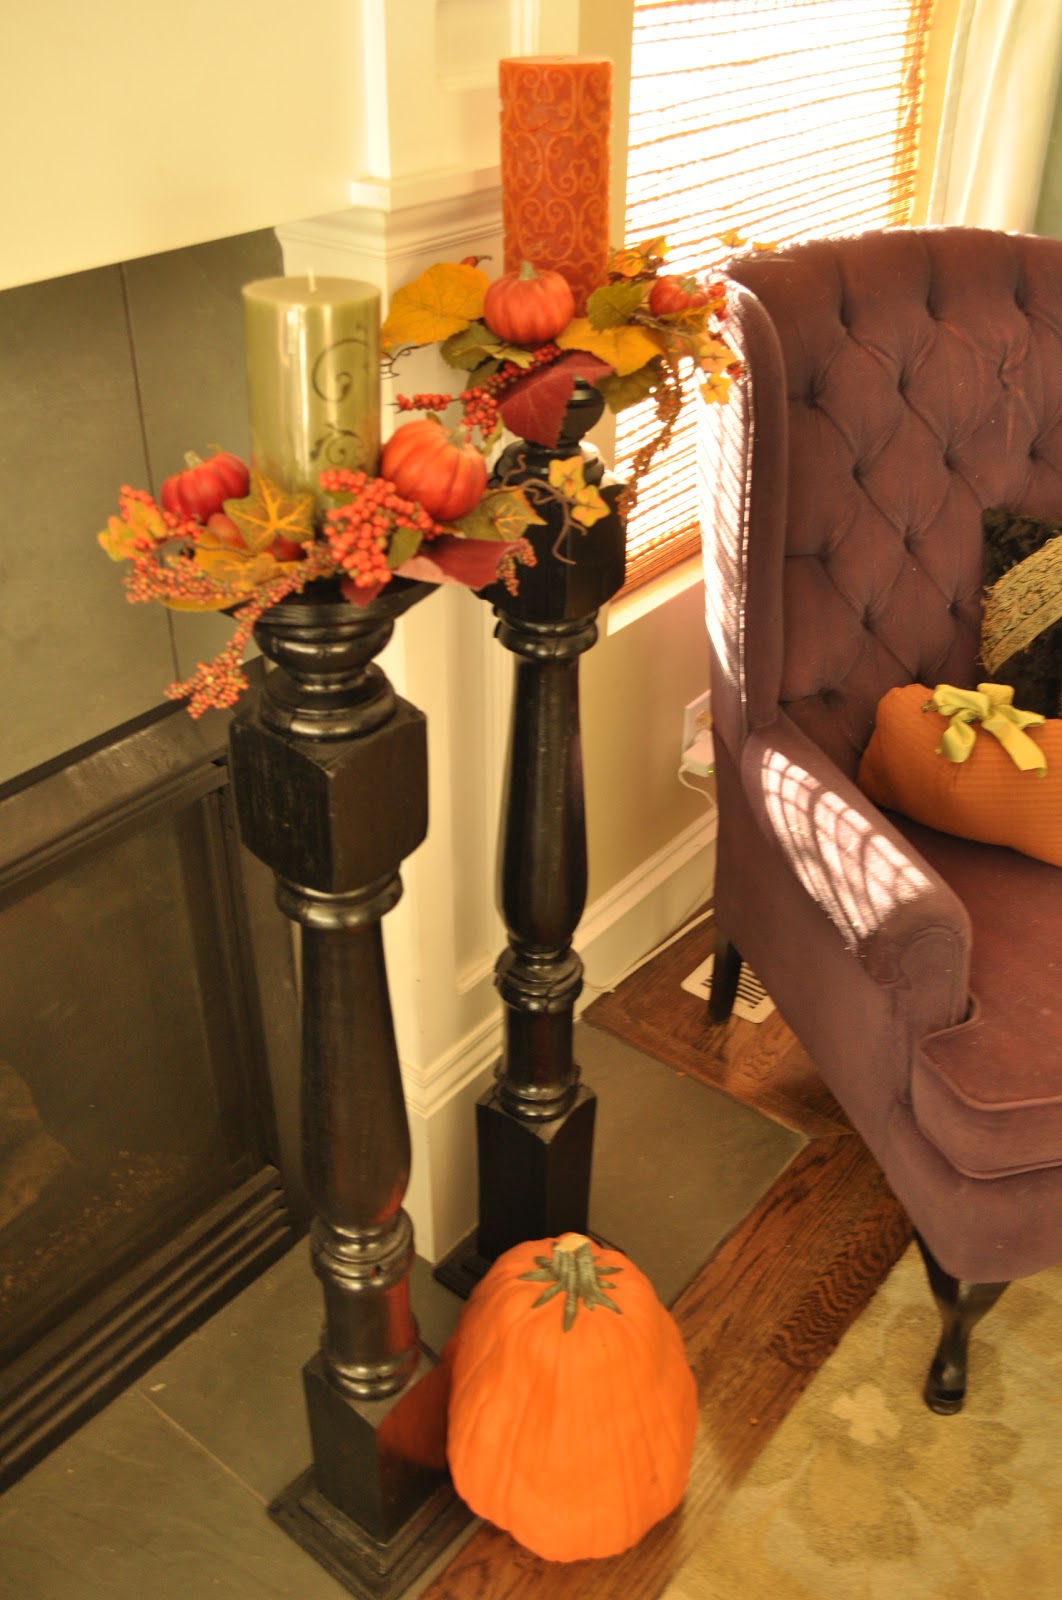
I love the colors of thanksgiving. The oranges, reds, rusts, greens, yellows and purple. What? purple. I know...purple isn't a color I normally associate with autumn but, I had taken down my halloween decor and couldn't take the purple chairs downstairs until my husband came home to help me take them down the stairs. I definetely couldn't get them down the stairs without banging the wall...so I was just waiting. My daughter was helping me decorate with my fabric pumpkins and she placed one on the purple chair with some different pillows and.....it worked?!?.
I never would have done this on my own but, it just kinda happened.  I love that I am going to get a few more weeks use out of these cool chairs. What do you think? Does it work? 
The black candle posts changed for the thanksgiving season. 
My painted wood box filled with indian corn, gourdes and pumpkins. 
The mantle done simply. 
The purple chair is unexpected. I think it might actually work because they are all jewel tones...what do you think? 
The green candle. 
The ornage orange candle. 
The other chair with my cream/green leaves design pillow with a fabric pumpkin. 

Simple warm happy colors across the mantle. 

I like to decorate simply for thanksgiving because I need a "lull" from all the decorating of halloween and christmas. It works perfectly for me for the season so I am excited for christmas. So, what do you all think...do the purple chairs work?  

LinkWithin

Related Posts with Thumbnails