The printer's drawer cabinet that I have been working on for a while is finally built!! YEAH!!!! I have had this in mind for about a year and I have been working on it once a week for the last two and a half months at my neighbor's woodshop. It started as a big sheet of high grade plywood with a hardwood exterior with a solid wood faceframe into this beauty. It's still amazing to me to see what you can build with some wood!! Wahoo!!! I love when my ideas come to life!!`
The
library card catalog is actually a base peice and was meant to have another stack of drawers on it. So, I built the printer's drawer cupboard to be the hutch. Therefore I made sure all my router bits on the tops of each cupboard were the same so they would match.
It's amazing to thing that this was what it looked like at the beginning. Just peices of wood cut to size with shelf grooves and a dado joint in the back for the backing of the cupboard.
The beginning stages. Once it was cut we did a quick sanding to get rid of any splinters.
Glued the shelf peices in and reinforced with a few nails for stability. It is one solid piece!!
Glued together and held with clamps. We waited til the next week after this step to let it dry. By this point, it becoming a little heavy. It's a solid built piece.
This is the original plans that we drew up because the printer's drawers are such a specific size and you had to fit the cupboard exactly to them with only a sixteenth gap on each sideso the drawer could slide in and out. We had to be REALLY precise....definetely measured twice before each cut!
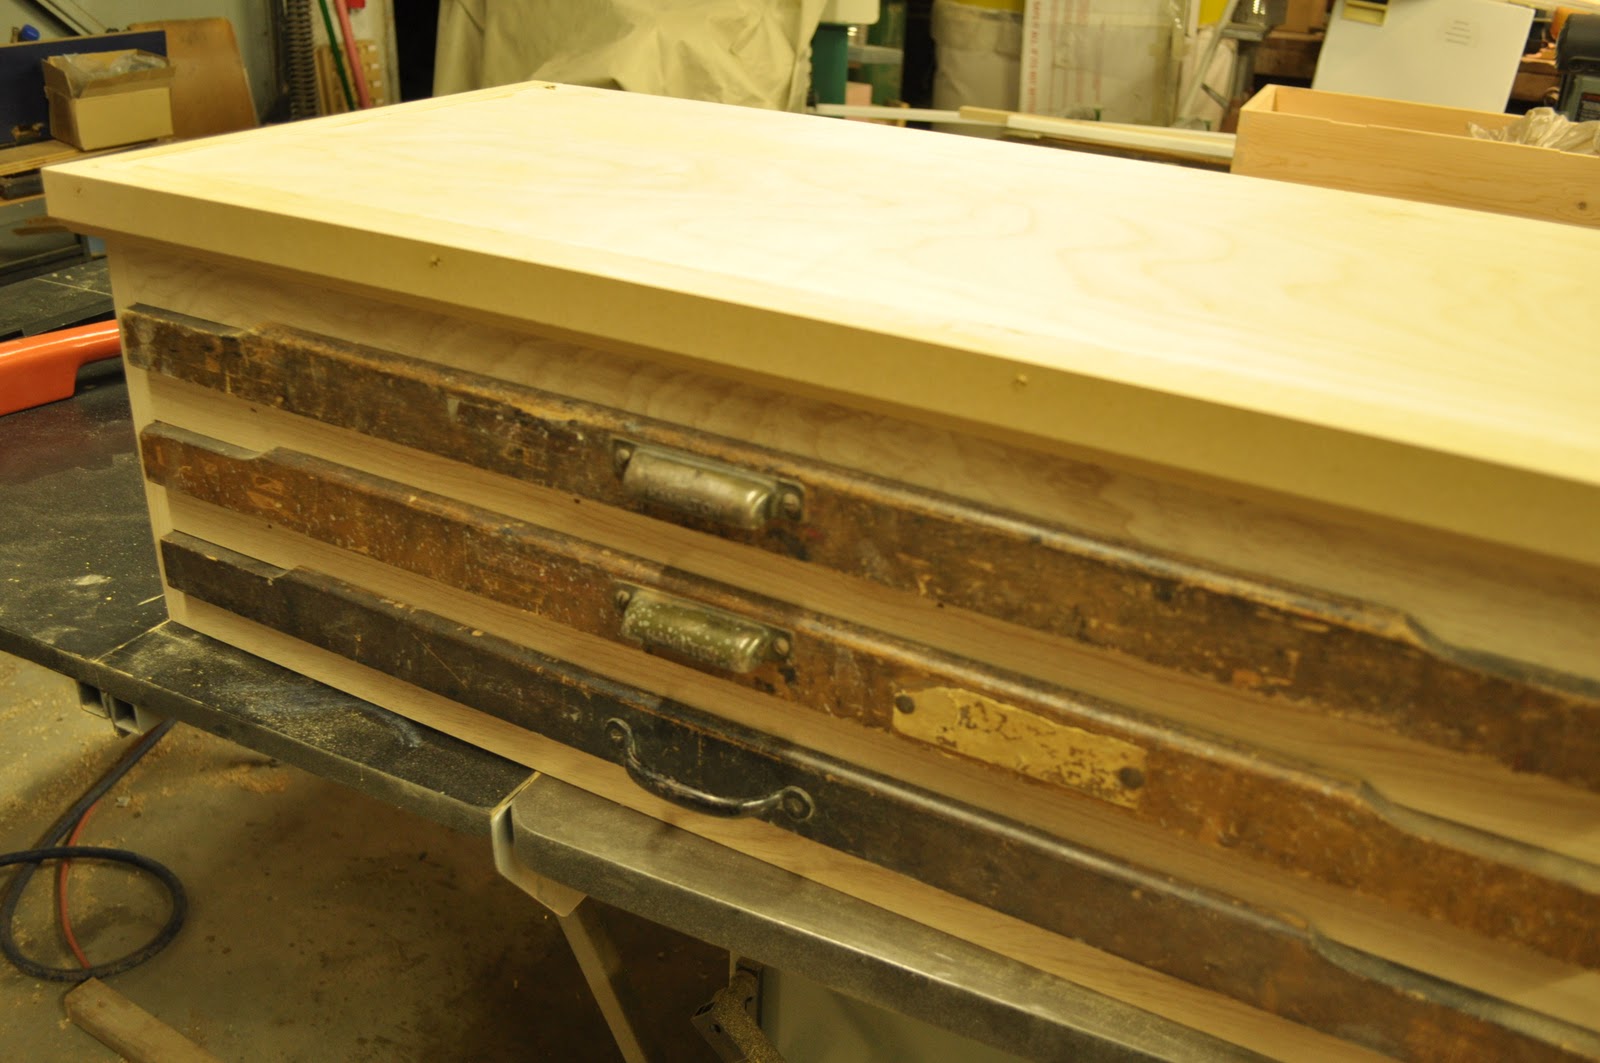
These are the three printer's drawers that I chose for the cupboard. I love the uniqueness of each one and that they are wood fronted. The later printer's drawers had metal fronts. I like the older ones with more character.
I LOVE the drawer pulls!! All original!!
The faceframe was made out of solid wood peices. It is the front of the cabinet. We had to match it up exactly to the cupboard because the drawers are only like 1.5 inches tall...we had to get it exact.
This is the cupboard without the face frame. We are making sure the drawers fit. We also added in runners along the top of the inside of each drawer so that when you are pulling out a drawer and it starts to tip down that it won't fall out. Nothing worse that picking up a whole drawer that would be organized.
The faceframe is made independent of the cupboard and put together with a specialty cabinet drill/screw peiece. It drills a hole on an angle and then the special screws tighten the whole piece together. It is quite the ingenious little invention.
The faceframe ready to be attached to the cupboard.
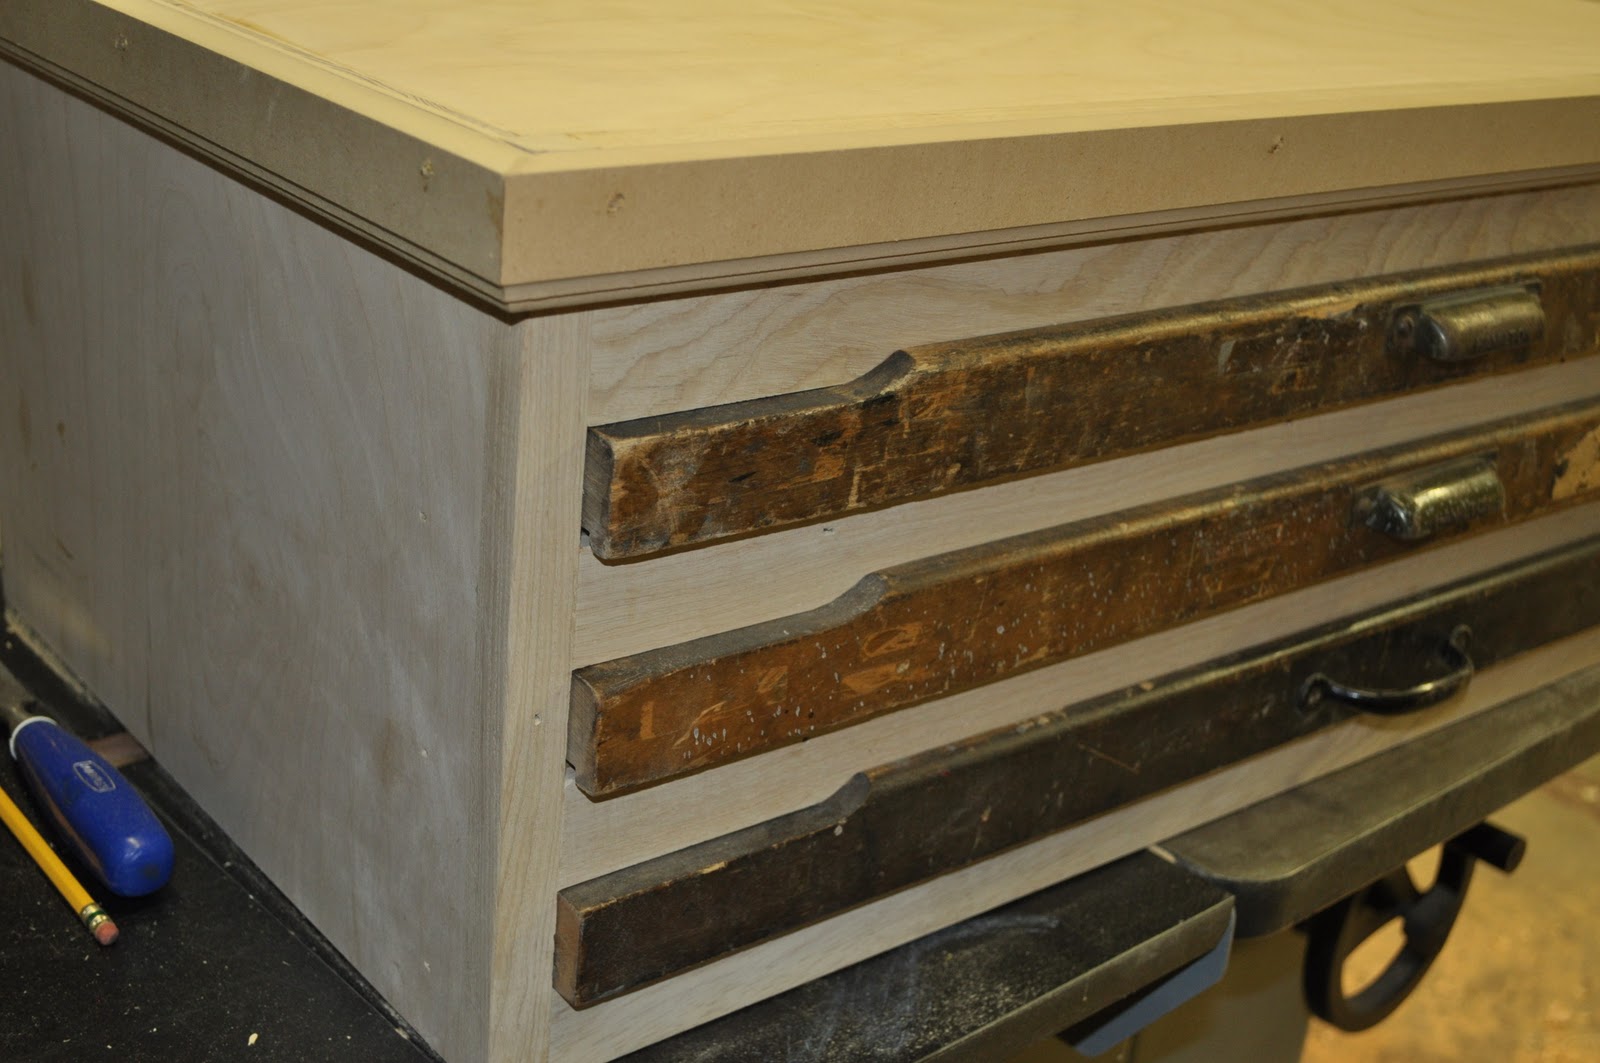
The faceframe is finished and we added a trim piece to the top edge. The top isn't on it yet. We used MDF for the routered edges because then they always turn out perfect. You don't have to worry about knots or imperfections in your wood piece if it's out of MDF.
Now you can see why we left such a large space at the top of the cabinet. Above the top drawer was taller than between the other drawers so that it would be more substantial. It is going to sit on top of the library card catalog and I wanted it to have more of a statement moulding so it looked the top of the piece. The routered edge is matched to the library card catalog routered top edge so that they are going to be able to become one piece.
This is the top all routered. I L-O-V-E love it!!! The distance between each drawer is kept the same above the top drawer because the moulding takes up the rest of the space. It looks more substantial with the added moulding piece. I love it!!
The back has a dado joint so that the backing sit into the cupboard. You can see the stoppers or runners along the top of each drawer. This is so the drawer doesn't top down too much when you are pulling out the drawer. Like I said, nothing worse than picking up a fallen drawer that was full of organized stuff. Mighty ingenious on our part.
This is the back. It is out of 1/4 inch hardwood ply and sits snugly in the back dado joint. It almost doesn't need a nail to hold it in place it's so perfect.
This picture show you the runners on the inside and if you look closely in the inside corner you can see the cool angle drill holes that were on the back of the faceframe. Quite the ingenious invention. No wonder professional cabinet makers use this...it makes getting your corners square really easy and so tight and perfect.
Now it's ready for nail holes to be filled with wood putty and then primed and finally painted.
I know the cupboard looks like it's floating but, it's not. I have it sitting on 2x4 blocks so that I could paint and prime it more easily. It is being made to sit on top of the library card catalog. I didn't want it sitting on the floor to paint it because it would possibly stick to the cardboard that I had under it while painting.
Aren't the routered edges beautiful?!!? I love how we made them to match the library card catalogs new top therefore this cabinet could be the hutch to that piece.
Primed with white primer because I will be painting it the same heirloom (or was it heritage?) white. Either way, it's going to be the same pretty creamy white as the library card catalog.
All primed and ready for the first coast of paint.
The first coat of paint is done and it has been moved on top of this dresser to dry and cure so I can still pull my car in the garage. I don't want to have to scrape windows if I don't have to...brrrrrr.
This is the printer's drawer cupboard all painted ready for sealer. I will use the same polycrylic sealer that I used on the library card catalog because they are going to be together so I better use the same finish. I love how the drawers are wood and will stand out against the creamy white color of the cabinet. I am SO excited about getting this piece finished and can't wait to put it to use in my studio!! It's gonna be purrrrdy!!
Hope you all have a great day...this definetely made mine!!