Friday, January 13, 2012

Sista!! We finally hung your shelf!`

My sister has wanted a shelf around her scrapbook room forever....really like two years! I found the wooden brackets (a whole big bucket filled with these) over a year ago and we just never have finished this project. It doesn't help that she is a  3 1/2 hour drive from me so......I had to make a trip just for this project. I even had to haul the wood down in my tahoe so we would have the wood for the shelves (nothing in town... oh the joys of a small town).
Within the first half hour after I arrived in town, I started painting the wood shelf boards. It has to be at least 40 degrees to paint so I had to get moving so they could dry. 
Then I painted the wood brackets black too. (side note: I even had to bring the paint because you can't get paint in this small town). My car was filled with kids, boards, paint, tools and miter saw. 
The first step was to chalk the wall with a level line where the shelf would hang. I then added wall mounts 18 inches apart where each bracket would hang. I drilled the 1/4 inch hole then added the wall mount. 
The shelf wrapped around three walls of the room. My sister wanted lots of shelf space to display all her mini albums, projects and memorabilia. 
The shelf was 15 inches from the ceiling. Plenty of room for any size scapbook albums that she wanted to display. 
In each wallmount (blue dot seen on the wall that allows you to anchor heavy items to a wall without having to hang in a wood stud) I screwed in a screw.  We made sure the screw would fit the keyhole on the back of the brackets. 
Each bracket is hung snug against the wall to keep the shelf solid. 
In a short amount of time we had all the bracket hung and ready for the shelf. 
Each shelf was cut so that any "joints" or where a board ended was where a bracket hung on the wall to support the "joint". 
This corner was tricky because the doorway was set at a 45 degree angle which made the shelf angle 22.5 degrees. I now know this by trial and error! As you can see I even cut the angle backwards and had to flip over my board. Good thing they are identical top and bottom....only that we hadn't painted the top of the boards (the first side had just finished drying). 
Once all the boards were cut to the right size we took them down and painted the top of the boards black. Once they were dry to touch we put them back up because they could cute up in their spots. It also kept them safe from the kids. 
The corner tured out so awesome.....I was nervous at first with this corner....trying to figure out this angle (which, if any of you have a 45 degree angle doorway....it's going to be a 22.5 degree angle for each board......which makes sense because each cut is half the angle!! ha ha) 
With nine foot ceilings, my sister really needed to use her vertical space to help organize her scrapbook room.  Plus, now she gets to display all her really cool projects!
It looks so custom and perfect! 
I wish I could have gotten pictures of items on her shelf and her room back together and organized but, the top of the shelf was still drying and curing. 
I was only there overnight and I think we got a ton done. We hung her gallery wall (previous post) and we also build, painted and hung shelving around three walls of her scrapbook room. We were busy!!! 
Look at all the space she now has to display all her NEATO PROJECTS!! Really, she's a very talented scrapbooker and is always coming up with new altered projects....I can't wait to see what gets displayed on her shelf!
The shelf even wraps the wall above the door. 

The shelf wraps three walls! A great way to use all that vertical space!
I went to my sister's house to help her hang this custom shelving around three walls in her scrapbook room, hang her gallery wall (previous post) but, the best part about being there was spending time with you sister, talking late into the night and letting our kids play together! My kids played so hard that they slept the entire drive home! It was a great trip and I am so glad we were able to finish a project we have been talking about for.....forever! Good Times! Love ya Sista!
Cassy Final

Wednesday, January 11, 2012

Hanging My Sister's Gallery Wall

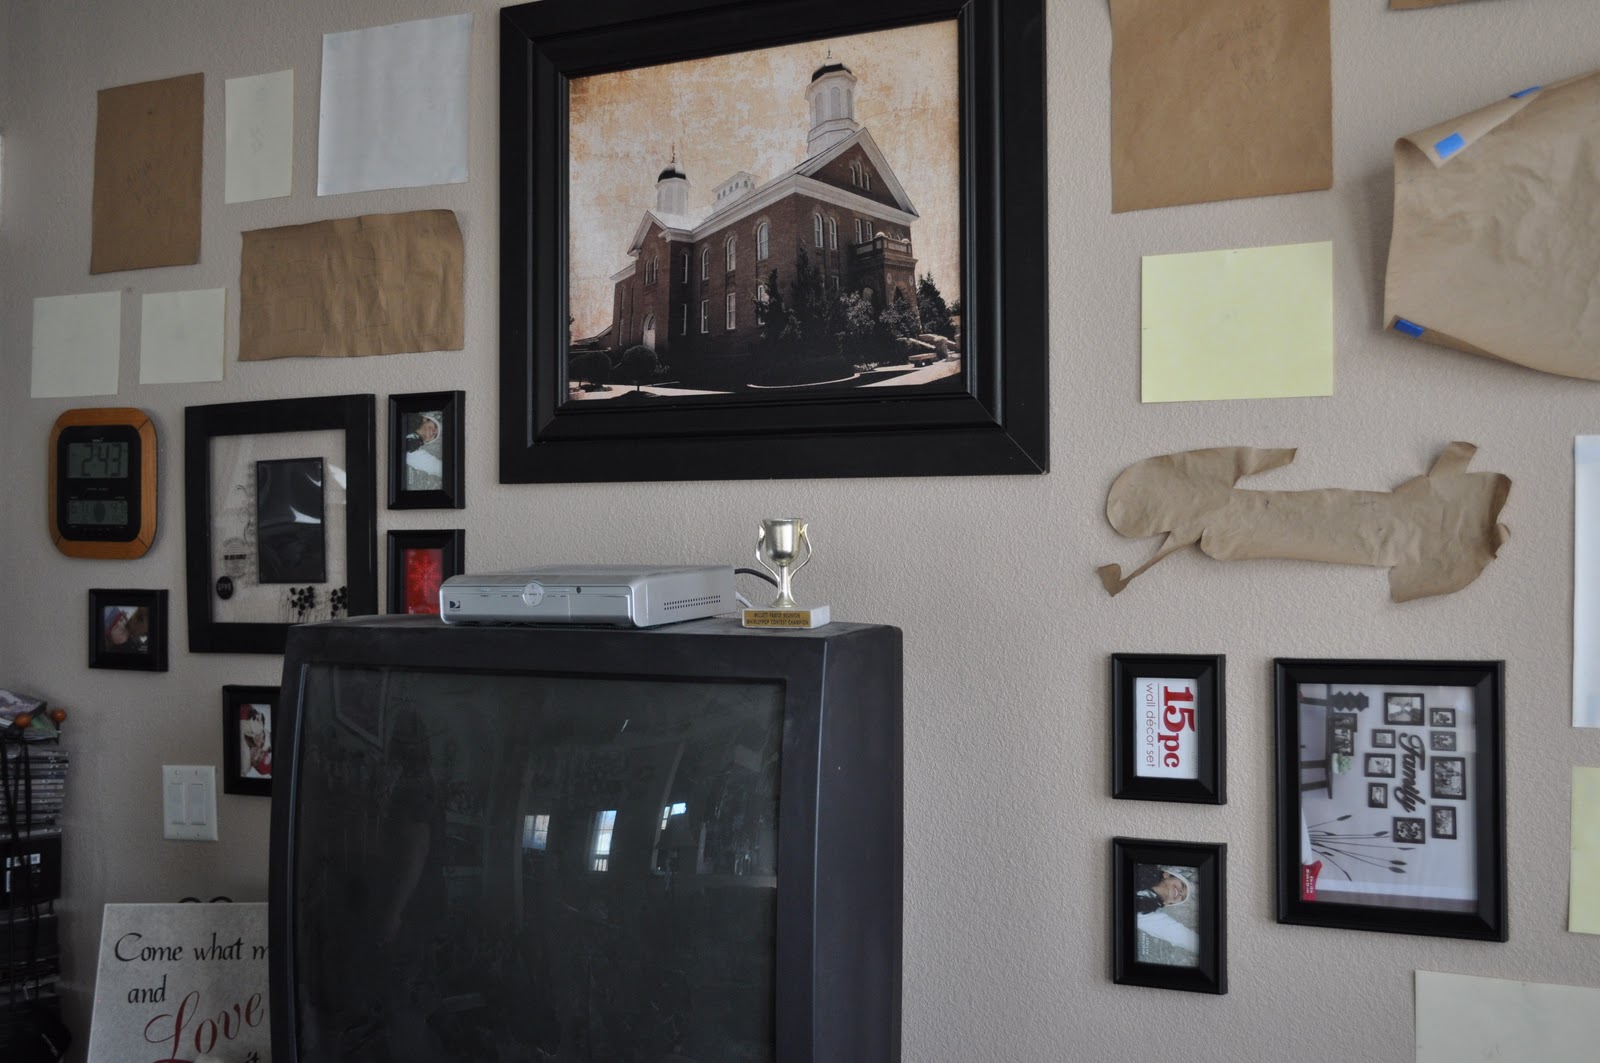
My sister has wanted to hang a gallery wall incorporating her baby pictures that she had hanging on the wall. Her husband bought her two packs of black picture frames and she also received a beautiful temple picture that she wanted part of the gallery wall. 
This is the original wall. It had her baby pictures to one side of the tv unit (that now has its hutch removed to be more modern) and a clock to the left. It was screaming for a gallery wall! 
To make a gallery wall super easy to hang the first step is to trace each of the picture frames and have a paper template of each frame. You also measure on the back of each frame where the nail would hang. This will be important for later.
We used any left over paper that we had available to make the templates of the frames and the "family" word. 
Then it's play time!!! We started with making the gallery wall square on the left side and started to work our way to the right.....which we didn't like.....and kept playing with. We knew we needed to round the left side to match the right side. The ceiling slopes down so we needed to incorporate that slope.
We then moved the top left corner so it's not so square because it didn't balance the other side of the wall because the ceiling tapers down. We just picked up the peices of paper and would move things around until we liked it better. 
My sister and I are picky about it being just right....so we kept playing...without putting any holes in her wall. The paper made it possible to move "frames" around without damaging the wall. Plus you get to see what it will look like without ever nailing a hole in the wall! Genious!! 
The last step is the easiest! You use the template papers to know where to place your nail. Each paper was marked where you are to put the nail so all you have to do is to place the nail directly over the paper and nail it through the paper. 
Then the paper rips right off and you are left with a nail in PERFECT position for your frame!! 
Now.....just a few more picture frames.....simple because I already know where every nail is going to go. 
 Here is the wall all hung with the picture frames....now we just need to replace the "fake" people in the frames.
LEFT SIDE (with Kung Fu Panda on the tv....ha ha....probably should have turned that off before I took photos....but, it wasn't worth disturbing five kids) 
RIGHT SIDE (in need of pictures in the frame and poster tac to make sure they stay perfectly straight no matter who slams a door) 
I love how the pictures look perfectly placed and all it took was making a template so it takes only 1 nail hole per picture frame. Simple and looks perfect!! Now she needs to fill the frame with family photos of her cute kids....now THAT will be the fun part!

Cassy Final

Wednesday, January 4, 2012

Yellow Chevron Chair for Bridal Showcase

This is the funnest...is that a word....I don't think so....oh well....it describes this chair perfectly.....because its the funnest chair!! This is a client's chair that I am reupholstering for a bridal showcase this next weekend.  The chair is for her booth at the brideandgroom.com showcase in SLC, Utah January 14th! 
Shannon is an amazing photographer and she has taken my family's photo ever since I met her! She does family photos but, LOVES Wedding photos even more! She's talented at whatever she photographs! Check her out at shannelizabethphoto.com !
This is the original chair with it's lovely pink upholstery and white washed wood. Great shape and details but, not a great colors. 
The details on the chair are awesome but, the coloring has something to be desired!!

I spent a few hours pulling staples out of the upholstery and stripping it down to the bare bones. I pulled off the trim on the seat but, left the material on until after I had painted it. I wanted to save the foam from getting painted black. I saved the arm chair foam by covering with painting tape. 
The painting tape kept the foam from being painted. I wanted to save the foam but didn't want to re-attatch it. Taping it off saved me from having to take it off a then putting it back on. 
The first part of the chair that is upholstered is the peaking back. I upholstered it facing out and then added the webbing to add support. 
Then I added the foam and upholstered the fabric to the front of the back of the chair. 
The hardest part was making sure the fabric was exactly level....it gets a little tricky with the up and down pattern of the chevron. Then it was attatch upholstery staples, upholstery staples, upholstery staples......it's a lot of staple to reupholster a chair. 
Then some trim to cover the staples and raw edge of material. This chair had trim around the seat, back and arms of the chair. 
The Yellow Chevron chair turned out beautiful! So fresh and wonderful! The chair is such a breath of fresh air......it made me want one for my entryway....but, the next best thing is to just stage it there and SIGH!! So pretty and would be wonderful for a spring entryway! 
I love the Chevron pattern on the old chair...a great mix of old with a modern fabric. 
The yellow is SO yummy! 
The peaking back is so pretty! 
I like this style of chair because of the peakin' yellow from the back. It allows you to see yellow color even if you aren't looking at it from the front. It would look great set away from the wall because you can see this yummy yellow color and fun pattern even from the back. 
I love the splash of yellow on the arms...so fresh! 
Look how cute the Yellow chair looks in my entryway....what an entrance...now I'm ready for spring!!  Fresh and Happy!! Too bad we're months away from spring! :(
Then I got playing around with different pillows. All the pillows looked so cute..I couldn't decide which I liked! 
This contemporary grey and white damas pillow brings in the wall color. Love that!! 
Or maybe just a simple grey patched wool pillow! Any pillow I put on it...looks awesome!! That's a sign of a GREAT chair!! 
Or a simple white pleated pillow looks great too!! Good thing I don't have to decide.... 
This chair will be perfect for her bridal show that she has coming up. She is doing a booth in yellow, black & white. This chair will be P-E-R-F-E-C-T...........perfect!!! Who knows....maybe she will add a pillow....everything looks so pretty on this chair! I am very happy with how her chair turned out! Such a breath of fresh air!
Cassy Final


LinkWithin

Related Posts with Thumbnails