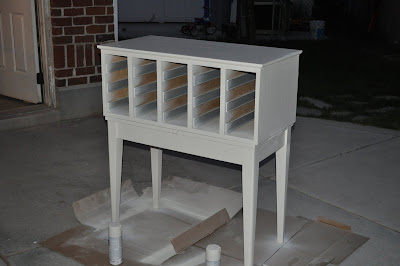
Now we are ready for paint. I painted it an Heirloom White color by Rustoleum.
I am super picky about my technique with spray paint. I like the convenience of it in a can but, I want it SUPER perfect and I was SUPER(could I use another word???) excited that it came out great.
I painted the front inside edge but, not the entire inside. It's MDF and would have soaked up the paint.
The last bit of hardware was the rods that went down the center of each drawer to hold the metal sliding thing (real technical right?) that held the catalog cards. They are tension fit in the front of the drawer and I was happy about that but, I didn't need the rest of the rod down the middle of each drawer. So, I got my husband to cut them off for me.
He used his handle Dremel tool.....if you don't have one of these....you should....they are handy for tons of projects.
He had to rig it so he could use both hands to cut the metal rod. Yes, he was nice enough to scoot his car fixing tools to the side so he could help me with my project for a few minutes. (I think he has the intake manifold off....don't really know what that means but, I guess it means progress on his project?)
He used a bungy cord around his workshops drawer, hooking it from one side of the drawer, underneath and then back to the other side to hold the cutter end of the Dremel. Pretty ingenious!!
Clever huh? Yep, that's why I married him!! LOL Okay, there were other reasons too!!
Here is the drawer rods ready to be cut off.
I am glad he was the one to do this because the metal cutting made some noise and sparks were flying. I might have been a little nervous to do this myself. Happy to be behind the camera taking pictures while he helped me out with my project.
Here's them all cut off....and yes, that is me covered in paint....typical!!! Ha Ha
This is the finish I decided to use but, it was so warm that it dried quickly. I had to put three coats on the top of the card catalog(with sandings between) before I was happy with the finished product. It just dried so fast that there wasn't a whole lot of time to fix imperfections and since I can be a perfectionist sometimes...it got done not once, twice but, three times. I guess that makes for an extra protected top....which is good since I am building a cupboard for my printer's drawers to go on top of this.
This is the drawer fronts with their poly.....ready to dry and have their hardware put back on.
This is the cupboard with it's polycrylic sealer on it.
The knobs all cut off and ready to be tension fitted back in the drawer fronts.
Each of the drawers and wood fronts I numbered. I knew with old cupboards that some drawers might have gotten used more than others and I wanted it to all fit together after all the hard work I'd done so, I numbered everything. I painted the top of the inside of each drawer but, left the bottom (where it connected with the drawer) un-painted so I could see what number I labeled it. So...I could put it all back together again!!
This is the first drawer front with it's hardware. It looks SO PRETTY...like icing on a beautiful cake!! Ha
Anyways, I can't wait to do the next post because it's the reveal!! Yeah....it turned out so pretty!!


No comments:
Post a Comment