

I am in love with this beauty! I love halloween and YES......this chair is spray painted and hand painted to create this one-of-a-kind halloween chair!! This was SUCH A FUN project!! 


Even if this chair came about by using a different project that just didn't work out...it still turned out great! This chair came about after I tried the new "fabric paint"(new marth stewart paints mixed with fabric medium) that I had seen on a few blogs and on the internet. Let's just say that it turned out just the same as my spray painted purple tufted halloween chairs last year. What a bust!!! I think the paint would work fine if you were stenciling a small amount of paint on a linen/canvas type fabric and made a pillow out of it but a soft tufted wingback chair didn't work...bummer!!


I used the thin car tape I bought at a specialty car painting store....this roll of tape has come in handy more than once!

I used another roll of tape I had laying around to make the stripes on the back and sides of the chair. I love the mixed-match look on the chair with the solid black on the tufted inside and the sides and back in stripes.

Then it was using left over black cans of spray paint that I had lying around. I didn't buy anything extra to do this chair. Once I realized the fabric paint wasn't going to work....I pulled out my left-over supplies to make it into a halloween chair...perfect and didn't cost me anything extra. Just used what I had on hand!
I love the MOODY BLACK with a slight blue undertone (from the blue color I had originally painted the chair) that the chair took on.....too perfect!

I started the black painting with the stripes after I had everything that I wanted to stay white, covered. The tape didn't stick that well...but I just hurried and stuck it down and then painted. So the stripes aren't perfect but, nothing with halloween is about perfect.

Here she is all painted black....ready to have the tape removed.

I then used acrylic craft paint to paint on a design/owl onto the inside of the chair.

This is how the tree and owl started....I just kept adding until I was happy.

I tried to make a trunk but, it ruined the look I was going for so I painted that back black and kept with the side tree design that I originally envisioned.

Looks much better with the side trunk!

The tape taken off to reveal beautiful imperfect stripes.

Not perfect because the tape doesn't stick well to fabric but, worked out well enough!
Pulling the tape off the back and sides to reveal black and white stripes.

Pull the tape off the nail head trim to reveal the white detail.

I wanted to add a "spooky" detail so I added the word spooky on the back of the chair to add a fun, small halloween detail. I used stayzon ink to get it on the fabric and then had to use black paint to fill it in to make it stand out more.

I had to add black paint to make it stand out more.


These are the supplies I used to add the "spooky" word to the back of the wingback chair.

This is the finished look of how the owl looked all hand painted with the white paint. I just kept added and added until I was happy with the finished result.

The owl was pretty simple to do although the button was a little hard to get it all painted white.
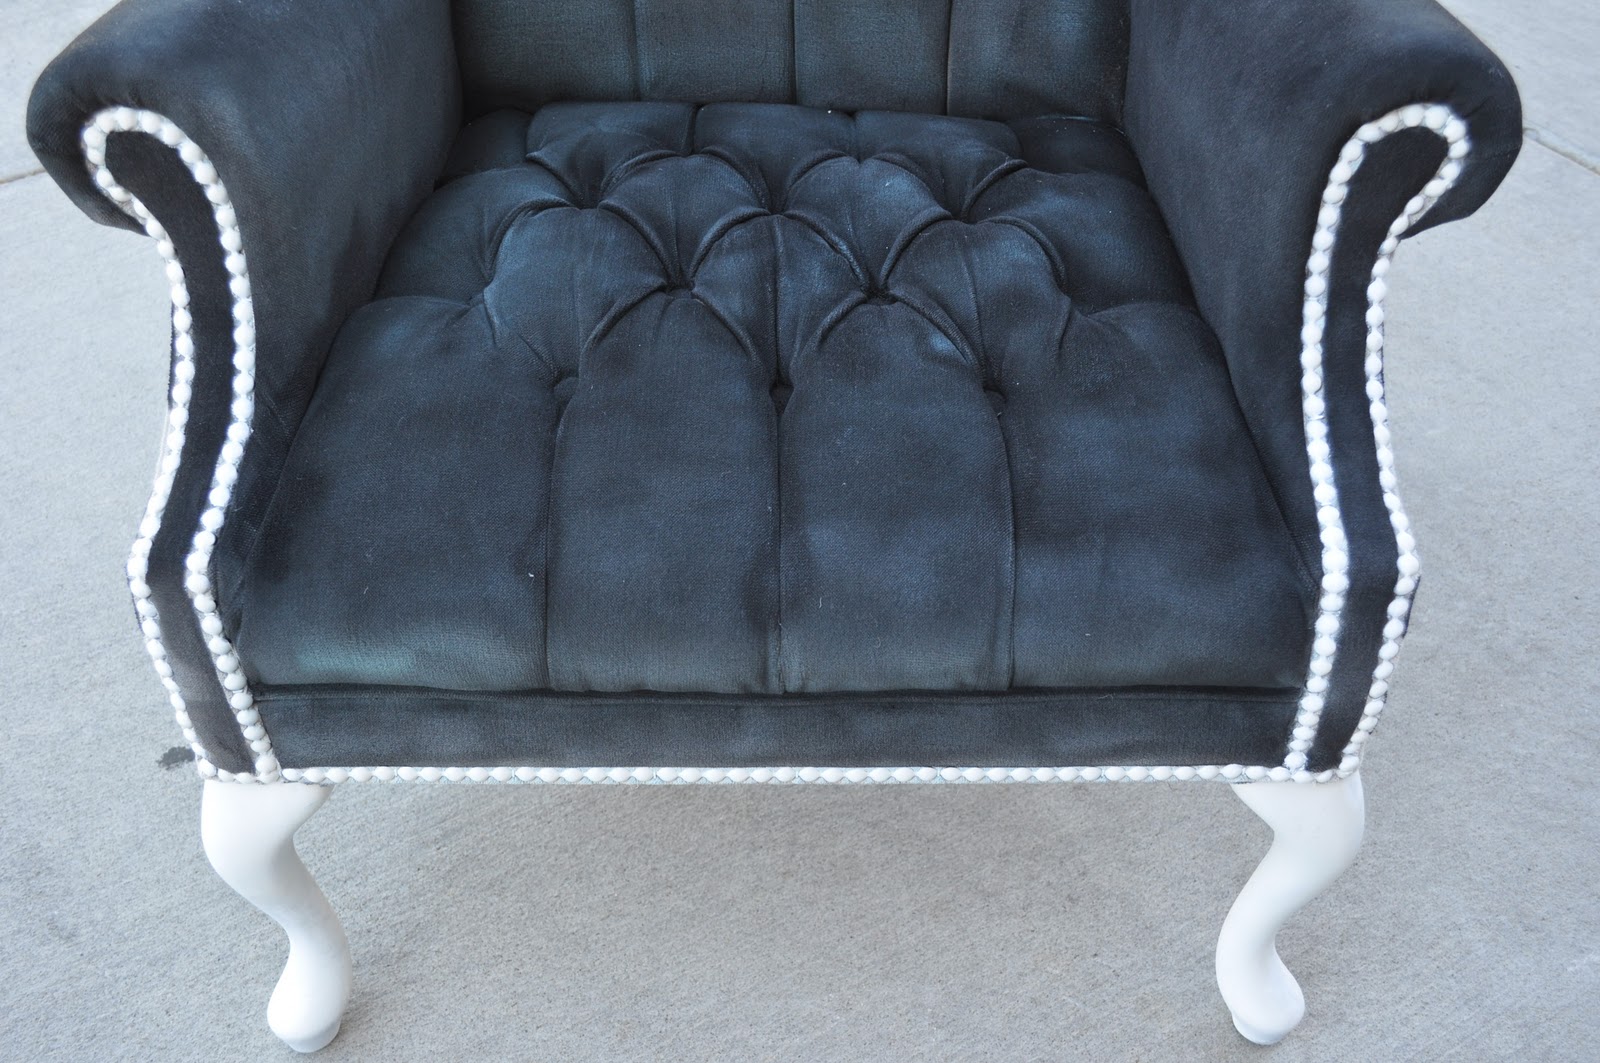
This is the white nail head detail and white legs. Love this detail!!

This is the legs, nailhead trim and stripe details.....LOVE IT!!

I love all the accents in white!

This is the hand drawing I did on a scrap of paper from the internet. I had to look at a few images and then draw my own......since nothing was EXACTLY what I wanted (of course! ha) Then, I had to draw it backwards from my drawing because I wanted the owl to come into the chair from the right not the left. So, it was a little tricky to redraw my own sketch onto the chair but, it worked out beautifully!

I changed the tree a few times because I couldn't decide if it would look better wtih a tree trunk coming from the bottom or from the side like I originally envisioned. The original vision won out!

The stripes aren't perfect but that's one of the things that are fun about halloween....imperfection is PERFECTION!!

This is such a fun chair and SO PERFECT FOR HALLOWEEN!! I am just tickled pink with how it turned out!! I LOVE IT!!!

The owl is fun and spooky!!

The stripes add such a fun element to the painted wingback chair!

The details of the nail head trim just adds a little something!

I love the MOODY black/blue color that the chair took on....it is perfect midnight sky....which is the perfect back drop to a halloween owl!! WHOO WHOO!! (LOL)

I love how the stripes wrap around the chair....

I can't wait to get all the rest of my halloween decorations out...this black & white spray painted/hand painted tufted wingback halloween chair has definetely got me in the mood to decorate for halloween!!


I like how the "spooky" word on the bottom is a small detail but, once you are close it is a fun little tag to bring the halloween theme in... (the baby in the background is pretty cute too!!!)


This will be such a fun addition to my halloween decor.....the chair turned out great!! I love halloween but, this might be one of my all time favorite halloween projects!!!

I can't believe what the chair originally looked like....

A chair bought off ksl to try and see if I could paint it with fabric paint verses spray paint like my purple wingback chairs from last year.

This is the fabric paint...a bust!! So..it was destined to become my halloween chair.

To this halloween gem!! I love this chair and it was pretty simple to do....just used some left over supplies that I had and created this one-of-a-kind halloween wingback chair!

This are my delicious tufted wingback chairs I did for my witch purple/black theme last year and they were SO FUN!! So, when this other chair didn't work out for family pictures...it also became a halloween chair!


Happy Halloween Everyone...even if it is a little early! It's almost October and then the fun decorating begins!!


