
I have wanted to use this cupboard door I found and knew it would be perfect above the master bed because it's SO long (approx. 6 feet). I have been working on this project WAY longer than I thought I would be yet, it's been worth taking the time to make it just right. The cupboard door was a street-side find and it's been sitting against the wall in our master bedroom for over a year with the intention to get photos in it to finish it.

This year I took the kids on quite a few photo shoots at lots of different locations. We definetely explored our own backyard....beautiful Utah! We even took our own family photos this fall by setting the timer on the camera and then running to get in the picture. Needless to say, my hubby bought me a remote for my camera for Christmas this year...HOW THOUGHTFUL?!? (probably because he was the one who mostly ran back and forth to push the button)

I wanted to take the kids yearly photo because I was NOT impressed with their school photos but, after taking so many photos...it was REALLY hard to choose only enough to fit in the six foot long door. You can see that with a few of the photos, I had a few options of very similar photos, so I finally had to make the decision of which one looked best with the photo to the left and right of it. If the photo was vertical, I had to print a 4x6 because the heighth on the opening of the cupboard door was 5 5/8 inches tall. If the photo was horizontal, I had to print a 6x8 because that was the smallest photo to print to get the heighth without having to trim someone's head off and still getting it to work horizontally.

I then trimmed each photo with my scrapbook paper trimmer.

I used Matte mod podge to adhere the photos to the inside of the cupboard door. I was really careful to not get any on the front side of the photos and then I let it dry for 24 hours.

The photos are stacked tightly side-by-side with no gaps.I wanted to make sure it was dry before I added the photo protector over the top. I didn't want any crazy bubbling. I have never used photo texture cream over the top before so I really wanted to make sure it was dry before I tried it.

These are the two different ends of the cupboard door and because it is a cupboard door...it's longer on one end than the other. It would be fine if you were hanging it vertically or just leaning it against a wall but, hanging horizontally above my bed gave me a problem. It looked unbalanced.


You can see how off centered it looks with nothing on the right side so I had a custom vinyl made with my new favorite saying...the saying that I found and have loved all this year. It was perfect to add to "this" year's photos.

I bought this photo texture cream from poppyseedproject.com and I was nervous to use it for the first time but, it turned out to be really easy and really is different from plain mod podge. It's a cream and a glaze in one and worked wonderfully.


You can see how narrow the inside of the cupboard door is. If the cupboard door opening is really large, you will spend a lot of money getting all your photos printed to the larger size.

In our family picture this fall, we included our angel baby's bear. The children took turns holding it in all the different family pictures. It was made by a special lady from the blanket that our angel baby was wrapped in. It was really precious for us that we can have him represented in our new family photo.

I used a foam brush to apply the photo texture cream although you can use a roller too. I didn't have a roller that was narrow enough to fit inside the opening and I wanted to make sure it looked nice so I chose the large foam brush.

Once it was applied, it was white but then it dried clear.


I let it dry for another 24 hours. It dried clear. It will forever protect the photos from little fingers that like to look and touch.

It took almost two weeks to get my custom vinyl. I guess that's what you get when you order something custom right during the Christmas rush.

To apply the vinyl, I measured from all edges to make sure it was straight. I then used masking tape right across the middle and measured again to make sure it was perfectly straight. You first apply half of the vinyl at a time. This way, it stays exactly where you want it and it stays straight without having to "eyeball" it. You cut half of the back off at a time.

Then you rub it down. It will be placed right where you originally wanted it. Then you take the backing off the other half.


Make sure to rub it down really well. You don't want any of the letters to move.

Peal off the special tape and you have your vinyl applied...exactly where you want it. Perfect everytime!

This is my favorite saying this year because I have truly had to find the happiness in life in the "little" things. It's been in those small moments that we have learned to be truly grateful for what we have.

The vinyl looked a little bare so I wanted to add some type of "swirly" thing. (Yes, that's my technical word, swirly. Real techical, huh)

As I was searching through my scrapbook rub-ons, I noticed I had a different white "swirly" pack. So, I started to play around with what I had on hand.

Don't you just love basic grey rub-ons...they are so pretty!

I wanted to add a little rub-on to the opposite corner...just a little something.

I applied the white rub-on first...I wanted them layered with the black being the most dominate, therefore I applied it on top of the white rub-on.

I love how they compliment each other...adding texture and dimension.

I layered the small one on the other side in the upper left corner.

We added three large picture hangers (we, meaning my husband attatching it with me watching) to support the weight of the door and made sure that it was hung on a stud in the wall.

It turned out just as I hoped it would!! A fun unique way to display lots of photos without all the frames!

It's a picture frame for all the photos I took and LOVE this year yet it's different and unique. I didn't want a bunch of frames on the wall so this solved the problem perfectly.


The small vinyl is in the upper left corner. Small and simple yet added a little something.

I hung the door frame about six inches above the headboard.
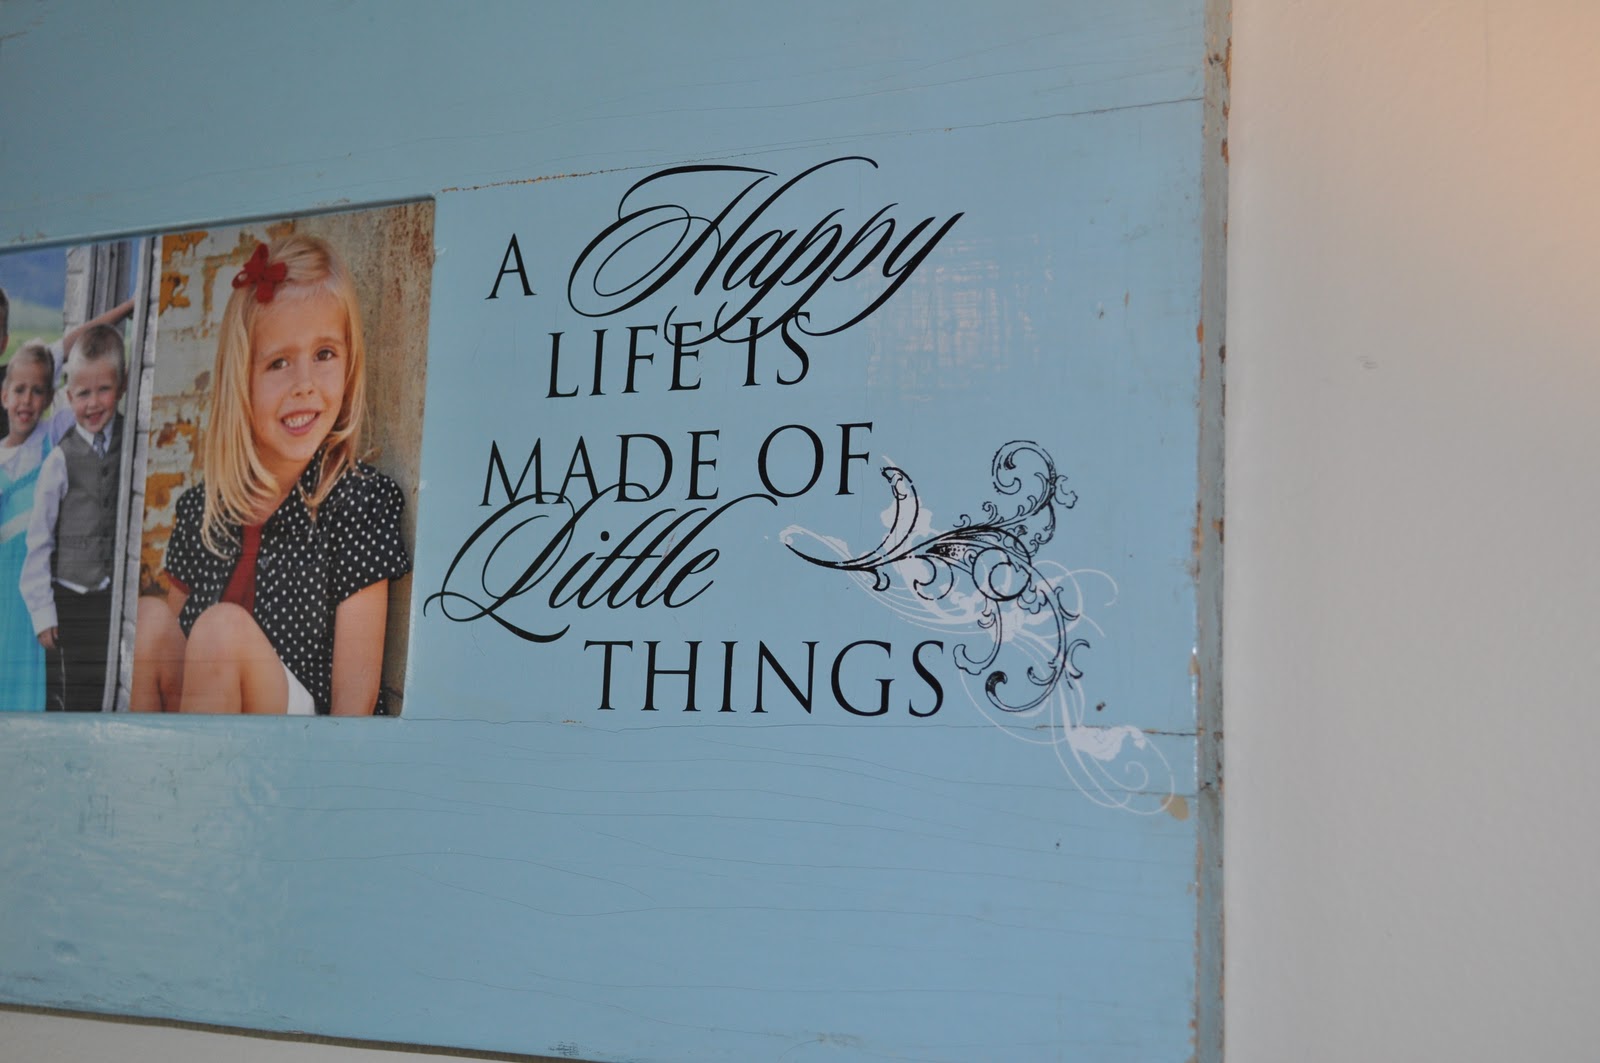
I love how the saying fits the right side and makes it look like the cupboard door was purposefully made that way....to include the saying!

I love all the cracks and original patina! This color of the door is original... you can imagine how excited I was to find exactly what I was looking for WITH the right paint color...let's just say I was ecstatic.

All of the little nicks and imperfections only add to the character of the piece.

I love the accents in our bedroom..such a fun blue! This phone is made to look old with all the modern conveniences...too cool!

Here's it all hung...thanks to my lovely hubby! This project took WAY longer than I thought it would but, was worth the wait!

It turned out SO cool! The blue is such a fun color! After looking at it everyday leaning against the wall for a year I am so glad it's done and hung! I love looking at the picture everyday! I just love my little family!


