Wednesday, April 28, 2010

Kitchen Table/Chairs

Now this post I am really excited about! I have been working on this for almost two weeks. It's had a lot of dry times and I really wanted this project to turn out nice. It was so worth it!!
Yeah!!! I finally have a new dining room table set! I have been priming, painting and sealing tables and chairs all week.
I painted the table black and the chairs a bluish/greyish/tealish color. It turned out exactly how I imagined it! That doesn't always happen but, I was thrilled it happened this time!

My old dining room table has been great! It was painted this cream color to match my red kitchen in my last house. It has a lot of wear and tear and was showing it's age. One of the chairs was missing an arm. One of the chairs had a peiced together seat and another was missing it's screws to keep the seat on the chair. All of this didn't bother me as much as the ratan backs in the chairs. Once a hole was formed....little fingers just couldn't stand not to put their fingers back in it. I was endlessly sweeping up peices of the backs of the chairs. That had gotten old....real old!

See what I mean!


See these beatiful chairs....no ratan backs!! Yeah!!
 
This is how the set was when it was given to me! (yeah, I love great family hand-me downs) It was solid wood but, had some wear and the finish was coming off. The color didn't match my home at all and I knew I had always wanted a black table...here was my opportunity.


This picture shows the sealant coat on the table. I put on FIVE coats of sealer!! I know what I am up against...THREE KIDS!! I want this to last and I put extra coats on to ensure it will last a little while.


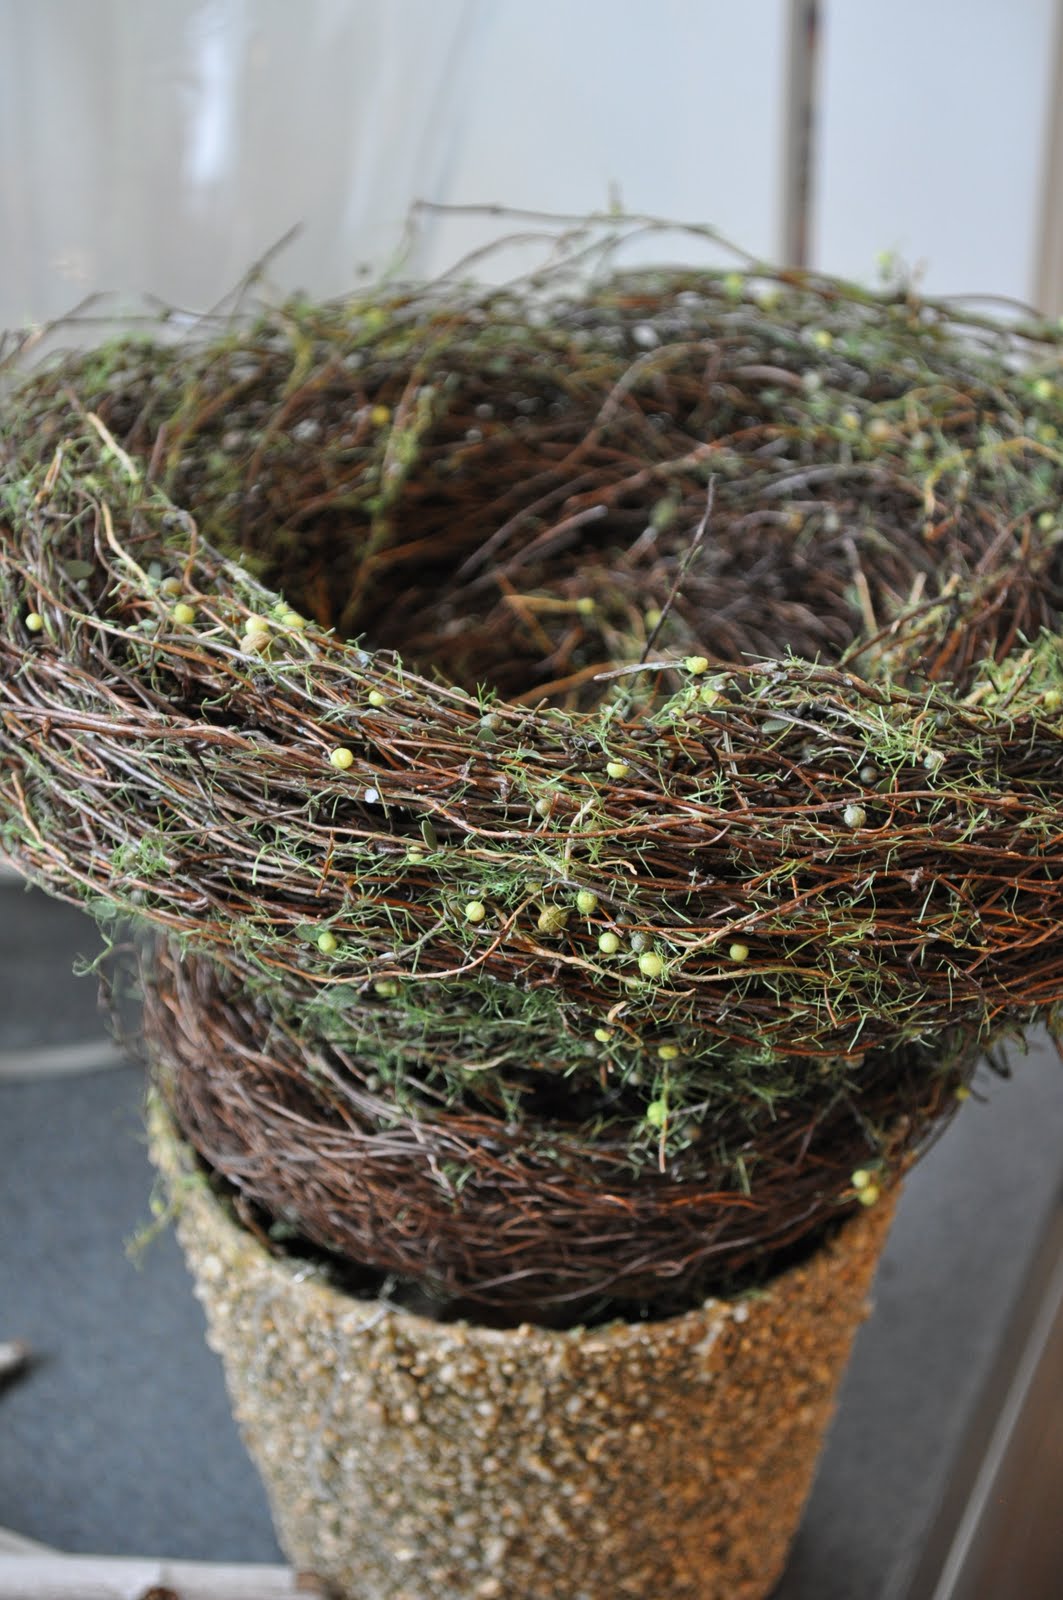
When I was at Tai Pan finding a nest for my bird, I saw these gorgeous plates. I already had an all white dinner wear set so I just purchased the salad plates. I'll use them as accents...no need to buy a new set. Use what you already have and just enhance it!


This table just makes me giddy looking at it! I don't think I've smiled so much in the same day in quite a while. It turned out gorgeous and I love the colors! The set only came with four chairs so I am on the look out (sometime) to find two more chairs. I think it would look really cool if they were different from the other four. But, for now....I am using the really cute green polka dot chair and the other booster chair for now. The kids use them anyways so, we'll just wait until we find the perfect chairs.

This table set was a lot of work because of all the spokes in the chairs. It took a while to get everything sanded, primed with kilz2(my favorite primer) and then painted. I coated these extra with sealer so they would last. I didn't want to do all this work and not have it stand up against the kids. I love how it turned out and I am thrilled to have it in my dining room!

Bird Nest Apothecary Jar


This apothecary jar I fill with all sorts of things depending on the season. I fill it with ornaments and fake snow for Christmas and Easter eggs for Spring. I didn't have anything to put in it for everyday!
This jar is so big that I didn't know what to do with it for everyday until I found this really cute bird. I decided I would need a nest for my cute bird. I filled the bottom of the apothecary jar with sticks and then went looking for nest materials at Tai Pan.
I happen to walk by the clearance center of Tai Pan and saw this beauty. A perfect nest for my bird. I just needed to take it apart and lose the pot on the bottom. Not hard since the reason it was in the clearance center was because they weren't glued together well anymore. So, YEAH a bargain!
This nest actually fit perfectly in my jar...how cool is that?! It was like it was made especially for the jar.
This is my cute bird that I found while shopping with my sisters when they were in town. It was less than four dollars and the perfect size to fit in my apothecary jar.
This is my bird, happy in her nest!
I found this cute little sign at the same place I found my bird. It was a couple of dollars. So cute!
I added the gauge wire around the jar to be able to hang the sign from. I just used my finger to wrap the wire around to create the curls.
The other apothecary jar is filled with robin blue chocolate eggs from easter. I think they still work since they are such a great spring color!

Now my apothecary jar has a great everyday look and I don't have to put it away until the next holiday because that is exactly where it was headed because an empty jar didn't look very good. I love this little project and it turned out to be a fun inexpensive project.

Sunday, April 18, 2010

Garden Party Decorations

I decorated for my daughter's birthday party. She would only tell me that her favorite color was green and that for her birthday dinner she wanted tomatoes and avocados. So, we did a garden themed party and had grilled chicken sandwiches with tomatoes and avocados. Yum!
This is the yummy spread! It all tasted so good and looked great!

I was even able to use my wheat grass to decorate with.


We bought her some "garden" stuff and used them for decorations. She kept giggling and telling us that she could see the presents and that they weren't wrapped. So funny!


I made these votives from thrift store finds! I bought all different styles and sizes of glassware and then used a huge roll of wire to create my own hanging votive candles. The glassware cost between 50 and 75 cents a peice. Great bargain! The wire was rebar wire from the fencing section of the home improvement store. It cost less than four dollars and has enough wire to wrap my house a few time. With all the wire I used, it hardly put a dent on my roll. Many more projects to come! Yeah!! 

When I was shopping for last minute items, I happen to walk next door to a dollar store and found these great fuscia pink lanterns. The lanterns that I was thinking about buying but couldn't get myself to splurge on because they were five dollars a peice, I found at the dollar store and they were even battery powered! Bonus!! The ones I found originally didn't have any lighting with them and I would have had to figure something out. This turned out WAY better and was easier on the pocket book!! Love that! Same great idea but for a better price!
 
The garden party theme turned out so colorful and created such a fun atmosphere. I didn't think I did too bad of a job from only "green" as my jumping off point. Pink is the perfect compliment to green and girly with a fun springy feel. She loved the party and was so excited!
I can't believe that my baby is five...she is turning into a beautiful, outgoing person. Can't wait for next year, I just hope you have more for me to go on than "green" and "tomatoes and avocados"! LOL
Love ya baby girl!

Tuesday, April 13, 2010

Trying a New Technique

This paint technique makes a chair or any peice of furniture look old and have a ton of character. Definetely a paint technique that I wanted to try!
I am trying to get my creative juices flowing so I decided to try a different painting technique. I saw this technique on a blog and it looked fun to try. She said you could use up to five colors although on her post she used only three. I decided to try a lot of colors. You have to use acrylic paint and not latex. It just works better. The first thing I did was find a chair with a good shape. Sanded it and then painted it a cream base color. Then comes the color.
I started with an aqua color. I wanted this color to show through. You paint it a color then you take wax from an candle and rub it where you want the next layer to be scraped off. Everywhere you put the wax, the paint won't stick. I've used this technique before to distress but haven't used it with so much color. Tip- rub the wax on in straight lines because if you do curly q's it will scrape off in this pattern. Hey, maybe that's something new to try...okay, maybe not.
Then because I love aqua, I did a different shade to see if it would add a lot of interest. When you scrape it off it will show these color, I thought it would be cool to have different shades of the color. It turned out that it didn't make that much of a difference. Oh well, this whole chair thing is to get the creative juice flowing!
Then, I added yellow. I only added it in places to put the wax over the top. In the end, you could't hardly see the yellow color. In other words, not worth the time to do this color. Next time, No yellow!
Then onto the pink! This color showed so well. Noted!! Fuscia Pink looks great!
I know, could there be any more colors...but, this is the final color. Green, not just any green but candy apple green! Then it was onto the paint scraper. Everywhere I had put the wax, the paint came right off. Tip-if you want a color to really show through well, make sure there is enough wax. Be generous!

I kept scraping until I was happy with the amount of color showing through. Tip- definetely use the paint scraper before you use the sander. Don't skip that step or it will gum up the sand paper.

Then I used Minwax gel stain over the top. The green on the top was REALLY bright. Candy Apple
Green bright. The lady recommented gel stain because the "gel" stain stays on top and can be used on everything. It doesn't have to soak into the wood or paint. The stain color turned out a little dark but still look great, just a little dark. I maybe should have used a slightly lighter stain.

 
I don't know if I love the stain color I chose but, this project was all about learning a new technique and being creative. So, I am glad that I tried something new...added to the repertoire. Hopefully it will serve me well in the future. I had fun doing it and I learned some new things along the way!

Thursday, April 1, 2010

Special Handpainted Armoire

I found a new little thrift store last fall while driving home from taking the kids to preschool. I stopped and found one of the best deals ever. I found a 1940's ish armoire. It is made of hardwood and was missing two drawers. This didn't bother me because I knew I could make it open shelving. He asked me if I'd take it for three dollars. I tried to not let my mouth hit the floor and told him I would take it. He took only cash and I searched my wallet and couldn't even come up with three silly dollars. So, I had to tell him to hold it and I went across the street to the grocery store and bought some licorice and got five dollars back in cash. I wasn't too surprised that I didn't have that much cash because I don't carry it that often. But, it did seem funny to me that I find the best deal ever and don't have three dollars to splurge on it. LOL

My kids lovingly called this peice the bath tub and shower. You ask...how did it get that name....well, it came by this name by the way it was shaped. The tall door to the left was the shower and since the drawer was missing on the right, you could open the door on the bottom, climb in, shut the door and it was a small bathtub. It's been in the garage since last fall and I couldn't decide what to do with it until I started it in January. The kids loved to play in it so, I didn't want to redo the peice until I absolutely knew what I wanted to do with it.


I painted the armoire a light ivory color. It was from a gallon of paint that I already had so it didn't cost me anything. I had to buy some high density fiber board (about $4.95 for a small pre-cut board) to build the shelves out of because I wanted them strong but not very thick. I used acrylic paint from the craft store to paint the green design so that cost me around a dollar. I bought the glass green knob pulls on sale for $1.50 a peice bringing the total for all the knobs $4.50. So, all-in-all I think I spent under twelve dollars for this project besides the baskets and I found those at Hobby Lobby and used a coupon. I bought the baskets, which I thought were cream color until I got them home in the same lighting as the armoire and realized they were a lot whiter than the armoire. So, I painted them green and love how it brings out the green in the painting. I love a good mistake. I distressed it so the peice would look "well loved".

To get the hand painted design I used some wax paper to first sketch out how I wanted the design to look. I used a magic marker to draw on the wax paper and then could reposition it to get to the exact angle. Then I would lift up the wax paper and use a pencil to trace the design. By having a rough outline of where I wanted the design to be, it made it easier to hand paint the design and make sure it would be right where I wanted it.

I used the wood to build in two shelves where the drawers were missing. I moved the only drawer left to the bottom spot so that the baskets would be together. I liked the look of the baskets in the two top spots better and I was lucky that the drawer could move to any of the spots except the top one. The lip on the drawer was wrong to fit in the top drawer spot. So, it was moved to the bottom spot. 
I left the inside of the armoire the original wood color. The outside of the armoire was really nicked and needed some paint but, the inside shows the beautiful woods. It even still had the cool metal coat hanger in the top so it still is a really functional peice. I distressed the outside only because I "felt" like it needed to look that way. I love how it looks.


I want to explain a little bit about this special peice. This armoire was painted with love. I used this peice to get away and have a moment to myself to be creative and find some happiness. It helped me to be able to get a little peice of myself back when my life was so unpredictable. It was the first peice that I had done "just for me" since we had been given the news about our son that he would not live. It was really hard for me to do anything and I hadn't done a project in months.  My husband moved this peice into the basement for me so I could be able to work on it even though it was cold outside. I look at this peice as Jacob's and Mine because we did it at the end of my pregnancy with him and finished it days before he passed away. At the end of my pregnancy, I was so physically exhausted that it took me more than a month to finish it. I would work on it a little at a time when I felt good. I think he knew how important this was for me to do something I loved because he always seemed happy when I was working on this peice. I definetely needed this little boost for my emotional well being. So, I wanted to show this special armoire that I did during a very sacred and difficult time of my life.This peice is different than other peices I had done yet, it is perfect. It looks "well loved" and is a one-of-a-kind with the hand painting. I will always look at this peice and know this one is special to me.  

LinkWithin

Related Posts with Thumbnails